
Curious about how to make your own bloody good treats this Halloween? For our Vampire Stand photo-shoot, we were tasked with making the playful sweets our jewelry collection are based off of! It was a lot of fun so we thought, why not share? So without further ado, the Vampire Stand recipes!
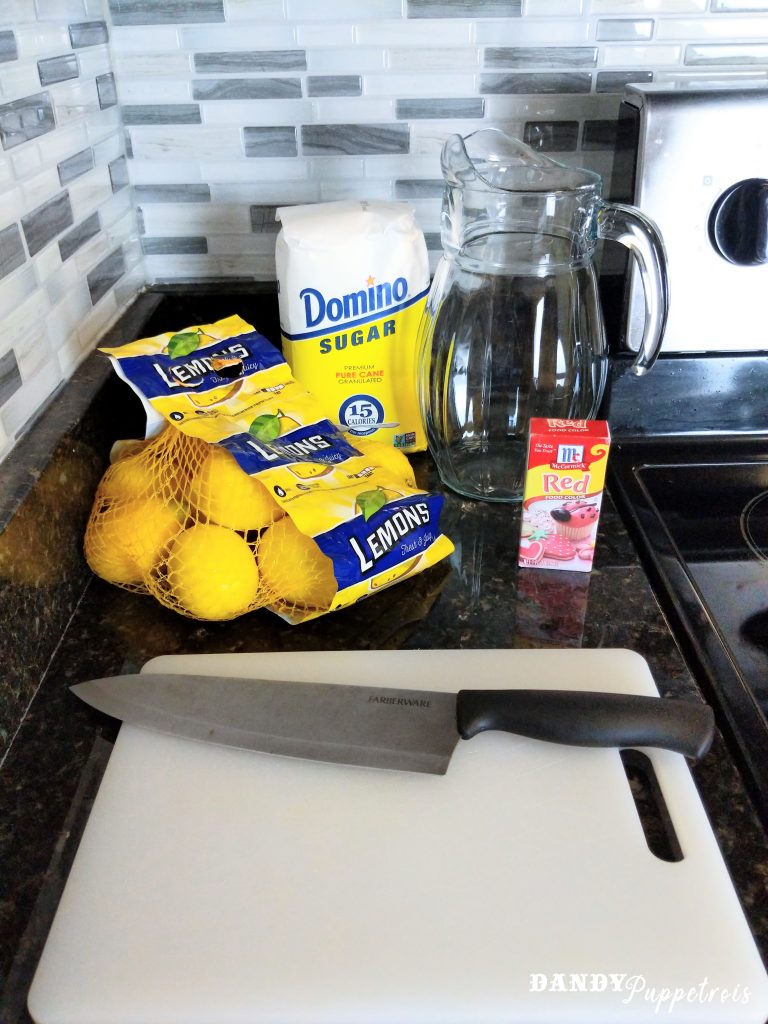
Blood Lemonade
- Bag of lemons
- 6 cups of water
- 1/4 cup of sugar
- Red food coloring (of your preferred brand)
- Cutting board
- Knife
- Pitcher
- Large Spoon
First you’ll want to properly wash your lemons to prepare them for cutting. You’ll want to cut at least 7 lemons into 4 equal pieces each.


Pour in the 6 cups of water into your pitcher. Then, squeeze 4 lemons worth of your newly cut pieces into the pitcher for the sourness (Should be 16 pieces). If you’d like your drink to be more sour, please feel free to add more! Mix well and then add 1/4 cup of sugar into the pitcher. (You can add more sugar if this amount isn’t your desired sweetness) Mix thoroughly until the sugar is dissolved.
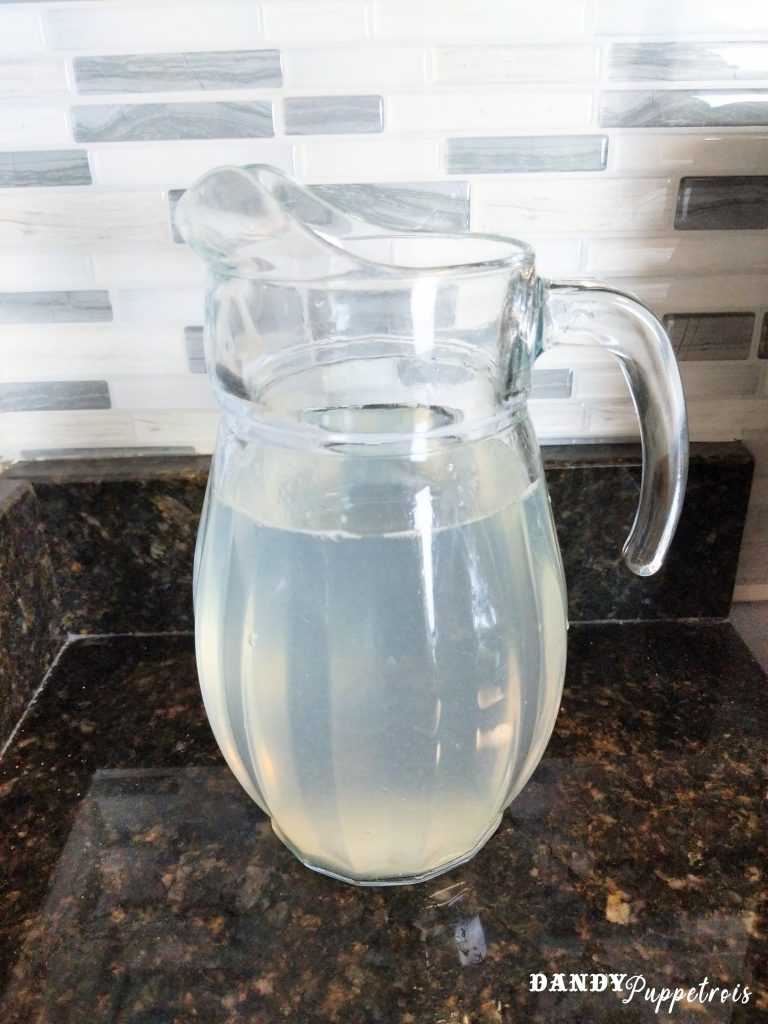
Once that’s done you can begin adding the food coloring. Depending on the strength of your food coloring, you might want to add more or less. We added 12 drops of our brand to get it to our desired hue. Mix well.

Once the food coloring is added, take the remaining lemon slices and add them to the pitcher. The drink will continue to get more sour over time!


Once it’s mixed and the lemons are added, set the pitcher into the fridge to chill and you have a bloody good drink! It’s a nice match to the ring right?

Blood Candy Apples
- 1 cup water
- 6 apples washed, stickers removed, and de-stemmed (we used Honeycrisp apples)
- Wooden sticks
- 1/2 cup light corn syrup
- 3 cups sugar
- Red food coloring
- Candy thermometer
- Wax paper
- Metal sheet pan
- Saucepan
- Oven mitt or heat protecting glove
- Metal spoon

For this recipe, we were inspired a lot by this candy apple recipe from Just A Taste. The recipes are pretty much identical with some applicational differences to make the treats more bloody. Start by washing and removing the stickers from your apples, as well as removing their stems. Then insert the wooden sticks into the tops. You can paint your sticks in advance like we did with any color or pattern you decide! Place wax paper onto the sheet pan, spread out the apples, and set the pan aside.


In your saucepan, add the water, the sugar, and the light corn syrup. Mix together while bringing to a boil. Use the candy thermometer to constantly measure the temperature. You’ll need this mixture to reach 300-310 degrees at least once. Make sure to wear an oven mix or other heat protecting glove while mixing and checking the temperature.

Once you’ve reached 300 degrees, turn off the heat and remove the pan. Carefully add red food coloring to avoid making splashes as the candy apple mix will be scolding hot. (Please continue to wear your oven mitt or heat protecting glove) Depending on your brand of food coloring, you may want to add more or less for your desired color. We used 2 tablespoons in ours.

When the coloring is mixed in, you can begin dipping! Take an apple and carefully dunk it into the candy apple mixture, twisting the stick to cover the entire body. Then with your metal spoon, dip into the mixture and pour over the top of the dunked apple. This is how we make the drippy “blood” lines to give the apples an extra spooky look! Set each apple back onto the wax paper so they can begin to set.

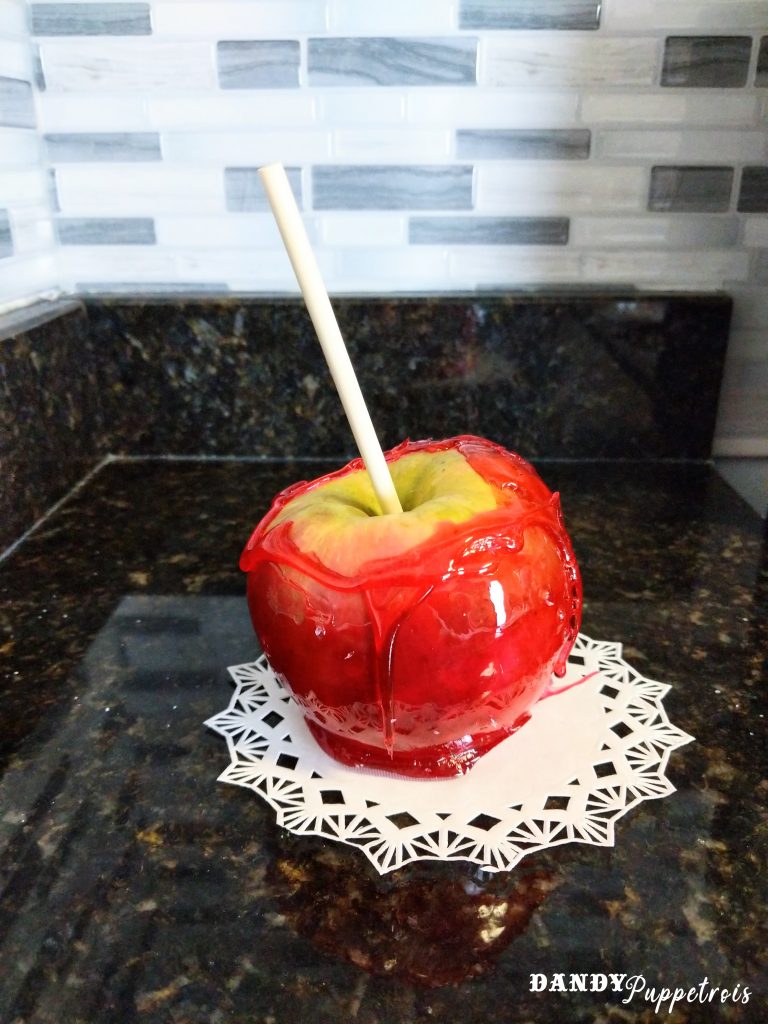
Once all apples are coated, set the apples into the fridge to chill and harden. And once they’re complete, simple take and enjoy! A nice spooky match to our ring!

We hoped you enjoyed these recipes! If you make any of them, please don’t hesitate to tag us on social media! We’d love to see what you create!